One of the best things about the art of wheat weaving is how easy it is to get started. Relatively few materials are required for most designs and techniques are easy to master. Techniques such as Plaiting and Marquetry can be featured separately or combined to create beautiful straw art from small jewelry pieces up to large sculptures.
The most basic straw art technique is called Plaiting (pronounced with a short a) and is also known as braiding or wheat weaving. Plaits can be made from whole, hollow stems of grass or wheat, etc., or from split straw.
Below you’ll find sample designs and instructions for a very basic Plait design, the Candy Cane. This piece can be made with only a handful of supplies, many of which you may already have around your house.
Wheat Weaving supplies include:
Wheat – any kind is usable, but wheat found at a craft store will generally be too dry and brittle. Contact us for places to get the proper wheat for weaving.
Carpet Thread – strong and durable, can be found at most craft stores
Scissors – small, sharp scissors work best for trimming small designs
Ruler – helps to measure length of braid before tying off
22 gauge floral Wire – gives stability to designs and allows for shaping
Click the headline or photo below to read each article.
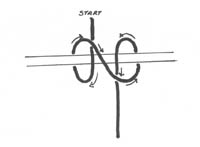 Important Knots to Know - Clove Hitch Knot: This knot is used to tie the wheat for plaiting (weaving). We use cotton button thread or carpet thread. Hold the straw horizontal. Lay the short end of your thread (about 3 inches) over the front of the straws and hold it with your thumb. Take the long end around the straw …
 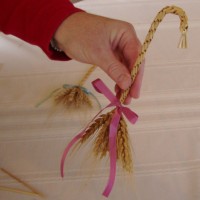 Arrow Plait – Candy Cane - Review how to do the surgeons knot and clove hitch knot under “important knots to know”. 1 – Soak your straws for 15 minutes in water. Select 7 straws. Place a #22 floral wire down the center of one of the straws, all the way to the head. Tie the 7 straws together using …
 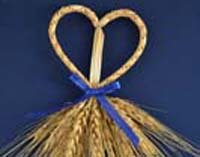 Arrow Plait Heart - Arrow Plait Heart: Make 2 equal lengths of arrow plait. The Plaits should be damp as you work with them. Cross the heads of the 2 plaits and use the Clove Hitch Knot and Surgeons Knot to tie them together at the beginning knots. Tie the 2 straight ends of the plaits together at …
 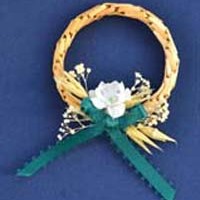 Arrow Plait Ornaments - Arrow Plait Ornaments: Make a length of arrow Plait. Tie the two ends together to form a circle. You may wish to keep the heads on or trim them off. Picture at right shows a bracelet that can be made. You may also wish to trim the straight …
 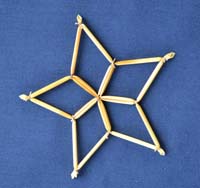 Five Pointed Tied Star - Tied Straw Work: Another method of wheat work is called Tied Straw Work. This method is very simple as you are only tying straws together. Review the directions for making a Clove Hitch Knot and Surgeons Knot listed in Important Knots to Know. For this project you are going to learn to make …
  Eight Pointed Tied Star - Tied Straw Work: Another method of wheat work is called Tied Straw Work. This method is very simple as you are only tying straws together. Review the directions for making a Clove Hitch Knot and Surgeons Knot listed in Important Knots to Know. For this project you are going to learn to make …